5 Steps to Wiring Recessed Lights
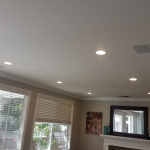
Recessed lighting fixtures can transform any home’s interior, adding light and ambiance to the rooms of a home. These specialized lights can give a room an elegant appearance, flooding the area with light, focusing illumination on specific features or work spaces, or providing a gentle glow to set the mood.
Installing recessed lights is a fairly straightforward process, but to do so safely, it is best to hire a qualified electrician. In this guide, we will discuss the steps a professional electrician uses to create wiring connections for recessed lighting fixtures in the home.
Installing Recessed Lighting
There are several steps involved in wiring and installing recessed lighting. Each of these steps must meet all applicable state and municipal electrical codes for safety; improperly-wired fixtures can be a potential fire hazard or electrocution risk. When in doubt, it is critical to get the advice and assistance from a qualified electrical contractor.
Step 1: Installing Switch Boxes
When installing recessed lighting in a given room, it is typically useful to have switches to control them. For single fixtures or a small number of multiple fixtures, existing wall switches may be enough to provide control, but in most cases, recessed lighting installations are equipped with their own switches. Switch boxes are located in a convenient area and affixed to the wall studs. Codes generally require these switch boxes to be installed 42” from the floor (measured to the bottom of the switch box). Multiple switch boxes should be ganged together for a clean appearance and easier wiring.
Step 2: Prepare for Wiring the Fixtures
A qualified electrician will have developed a wiring plan to ensure that recessed lighting fixtures and their switches can be installed to code specifications. Efficient wiring runs are the hallmarks of a professional installation. Using a specialized drill bit called an auger bit, the electrician drills 1” holes in the ceiling joists. It is through these holes that the wiring is installed. For tight spaces where there is not enough clearance for a regular power drill, a right-angle drill makes it easier to prepare the ceiling joists for wiring.
Step 3: Routing Wires to the Fixtures
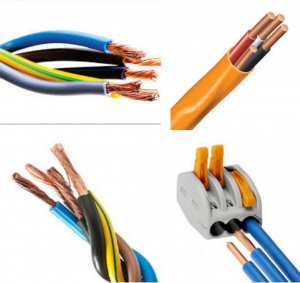
State or city electrical codes may require a specific type and/or gauge of wire to safely install recessed lighting fixtures. The electrician will know these requirements. Typically, a 12-gauge cable with two insulated conductor wires and a ground wire are used. The cable is jacketed with a non-metallic plastic jacket to protect it.
The cable is pulled through the pre-drilled holes, starting at one end of the new circuit and working toward the other end. If installing a series of lighting fixtures, it is better to run a single cable between fixture locations, leaving enough excess wire between each to make the appropriate connections.
Electricians often use a formula called the “Rule of Eights” when routing cables to new lighting fixtures and switch boxes. Eight inches of excess wire extends past each junction box, the cable is stapled to the framing around each junction box within 8” of that location, and the cable is fastened 8” from where it passes into the wall. This “rule” ensures that the electrician has enough wire to work with at each installation location and that the wiring run is securely fastened.
Step 4: Fixture Connections
Now that the cables are in place and fastened appropriately, it is time to wire the individual recessed lighting fixtures. Each fixture will have a junction box attached to it. The electrician removes the “knockout tabs”, allowing him or her to pass the cables into and out of the box. These cables are then clamped to the junction box with special box clamps.
A wire stripper is used to remove ½” of insulation from the ends of the black and white wires and from the end of the green ground wire (if applicable). For fixtures installed in series, there will be wires going into and coming out of the box as well as a single black and single white wire inside the box for the fixture itself.
The wires are then connected in the following manner: all three black wires (the “hot” or energized wires) are connected with a wire nut, and the three white (neutral) wires are connected together the same way. If a ground wire is present, it is affixed to the junction box’s ground screw or connected to another metal surface of the box. Many electricians prefer to wrap the wire nut connections with electrical tape to prevent them from unraveling.
Step 5: Switch Connections
The recessed lighting wiring process is almost complete. The final step is to wire the individual switch boxes to complete the circuit. Once the fixtures themselves are wired, a cable is pulled from the first installed fixture to the switch box, and the cable is then secured with a box clamp. The black power wire from the main circuit is routed into the box. Insulation is stripped from the ends of the wires, then each black wire is connected to a brass screw on the switch. The neutral white wires are not connected to the switch; rather, they are twisted together and connected with a wire nut. All green ground wires are twisted together and affixed to the green grounding screw on the switch.
Once the wiring is completed, the electrician tests the circuit and switches to make sure everything is working correctly.


 “Hi, thanks for coming to my website. I’d really enjoy helping you with your lighting and electric needs. I guarantee the fastest and most affordable options. Give me a call today!”